After a visit to the workshop of plasterer Michael O’Reilly, 2022 Scholar Sinéad Scullion explains the process of casting a simple cornice section...
For the second week into the SPAB Scholarship we have had the pleasure of learning from Michael O’Reilly - master plasterer, based in Reading. During this stint we are having practical hands-on demonstrations of traditional plastering methods run in a chronological fashion; beginning with vernacular wattle and daub and working up to fine decorative plaster casting techniques.
For this blog post, I look to explain the process of casting a simple cornice section through fibrous decorative plaster casting. This technique has the benefit of allowing off-site preparation resulting in quicker manufacturing processes. The fibre additive brings tensile strength which results in thinner lighter profiles and ultimately less material consumption.
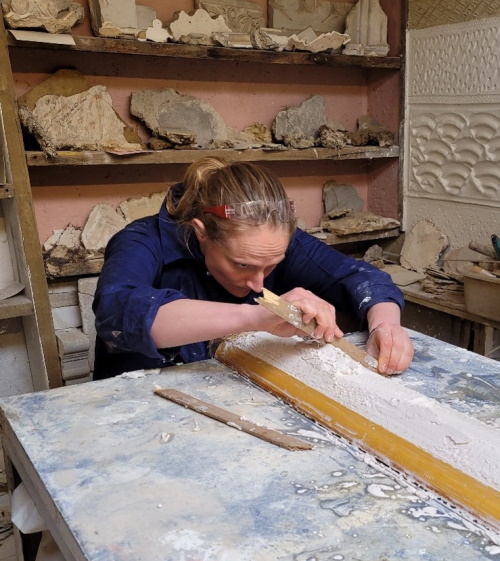
We cast against an existing plaster cornice template, sealed with shellac for protection. The template provided a negative formwork, resulting in the creation of a positive finished shape. The template was greased with tallow, to ensure the plaster did not adhere to the form.
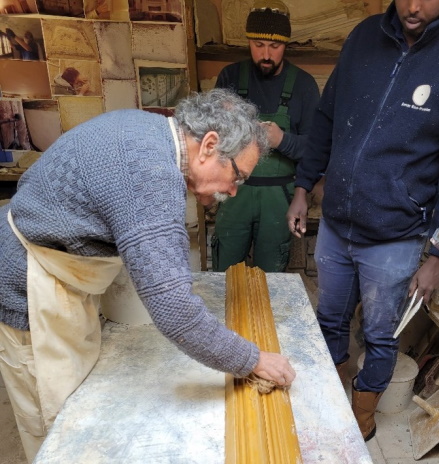
Timber laths and hessian were cut to size. Two bowls of plaster were prepared (water + casting plaster mix). The first bowl was agitated and the second bowl was left to sit and thicken for later agitation and application. This allowed efficiency in the sequence of works.
A large paint brush was used to apply a layer of plaster to the template, this was applied through a mixture of gentle paint strokes and splashing daubs.
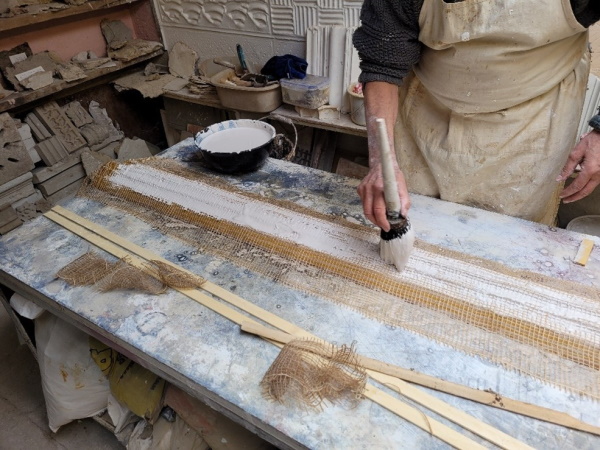
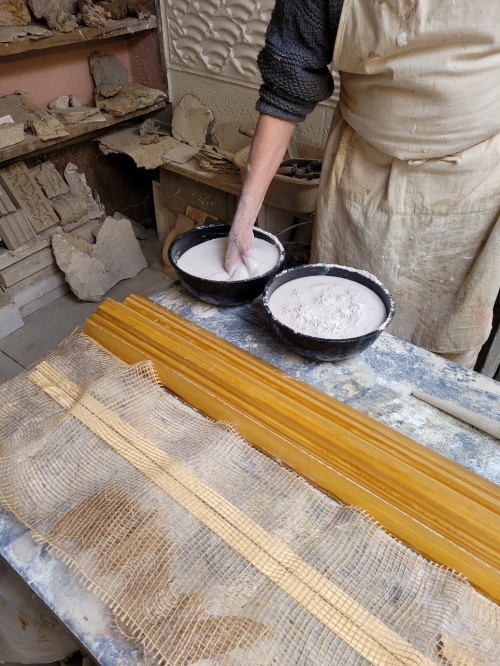
A piece of timber was run against the edge of the template to remove excess plaster and keep the line (striking-back). The hessian was laid onto the first layer (an insufficient first layer can result in hessian ‘grinning-through’ and should be avoided). The second bowl of plaster was agitated and applied to the works to cover the hessian. The laths were ‘buttered’ with plaster.
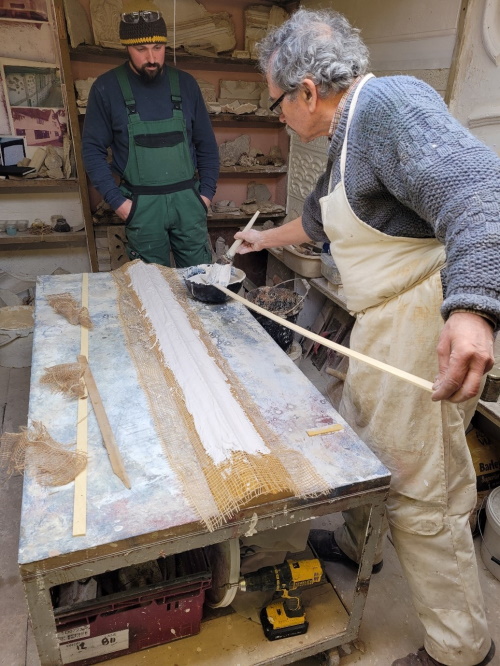
The lath was set into the section, ensuring that the template form was kept in shape. Excess plaster was struck-back to keep the cornice line. Hessian edges were folded into the centre of the back of the cornice and covered with further plaster.
Reinforcement fibre (hessian dipped into the plaster mix) were added to equal sections, we split the cornice into thirds. We ensured that right angles were maintained when fitting the reinforcement pieces, so that the finished cornice sits tight to the intended wall-ceiling location.
It was then splashed with a watered-down plaster mixture and edges struck-back to clean excess plaster from the intended finished shape. The plaster left to set. It was removed from the moulding when dry (our section was dry when we returned from our lunch break).
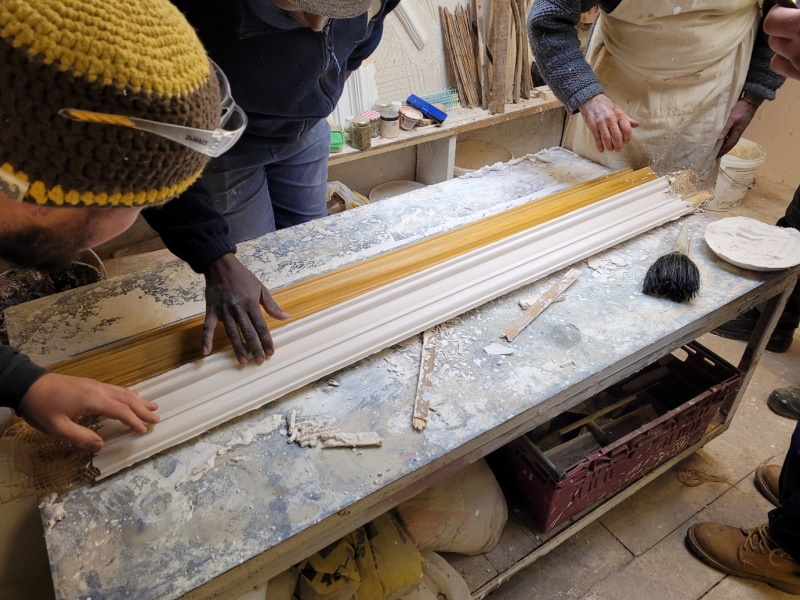

Ends sawn to neaten and fit to intended location. Ends can be mitred for corner situations, as required. Simple sections of mouldings mounted to wall-ceiling junction with plaster and mechanical fixings. Fixing heads made good and concealed.
We have really enjoyed our time learning from Michael and the opportunity for so much practical hands-on experience.
Our Since 1930, the SPAB Scholarship has offered an unrivalled training opportunity to architects, surveyors and engineers - to travel the country, learning on site from specialists working in building conservation. Find out more about the Scholarship, and our Fellowship scheme for craftspeople.